
Help Center > Agent Branding > How Can I Add an Agent Photo, or Custom Images & Logos?
How Can I Add an Agent Photo, or Custom Images & Logos?
The software allows you to add custom logos and photos through the use of a full width image upload. This means that you will create your footer or header image as you would want it to look in completion in the image software you love. Then you’ll upload that full image to the software using the pixel size recommendations we state on the upload controls. While this does take a little out of software work, it truly gives you full creative control over your agent identification and branding.
The upload controls are tied to the reports themselves as they are different for each report type and template.
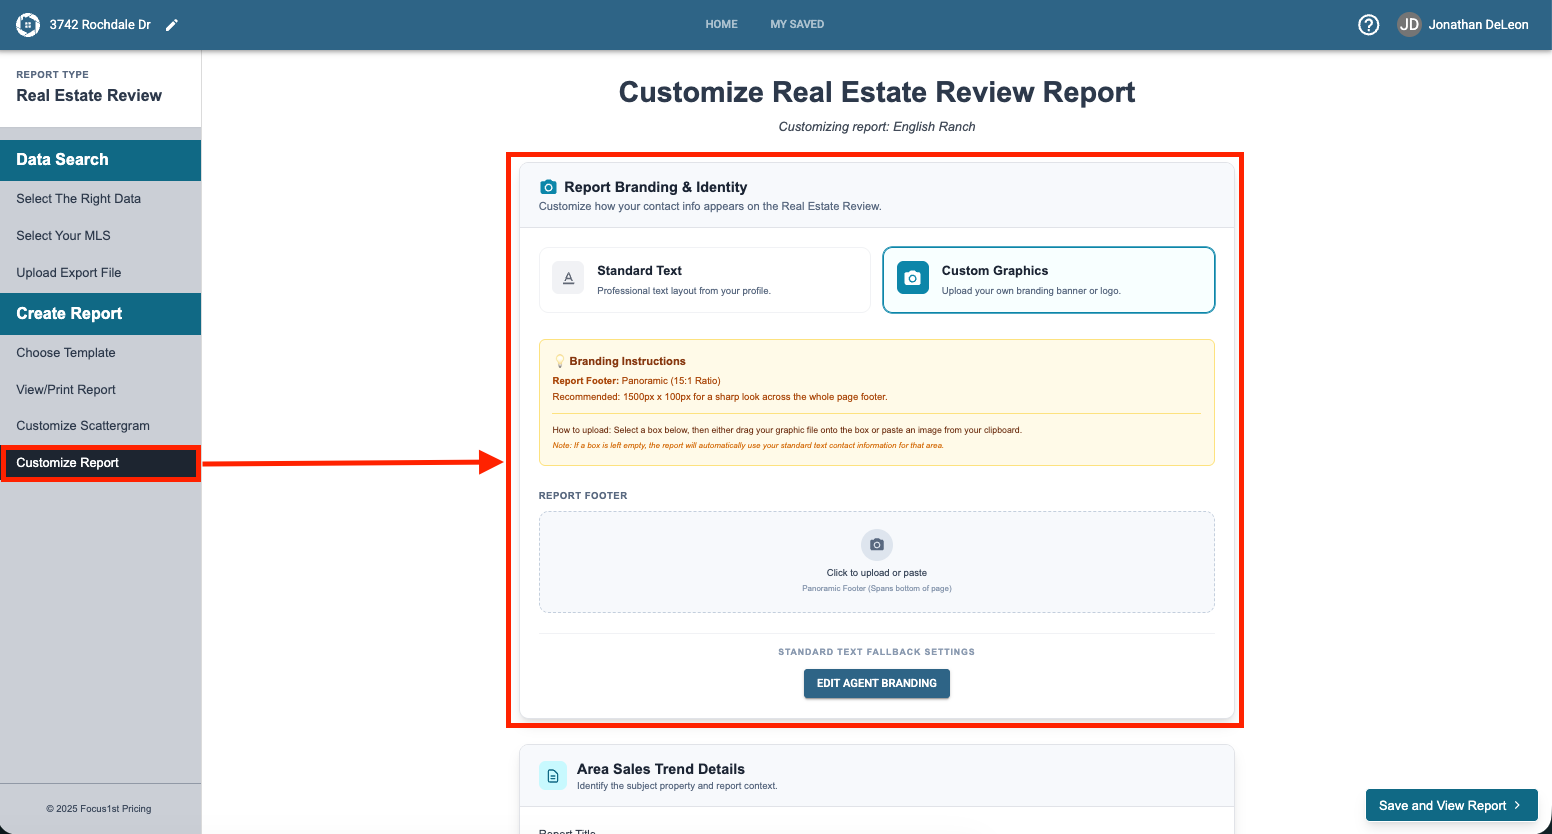
For the 1-Page Real Estate Review you’ll find this control under the Customize Report step after clicking the custom graphics option.
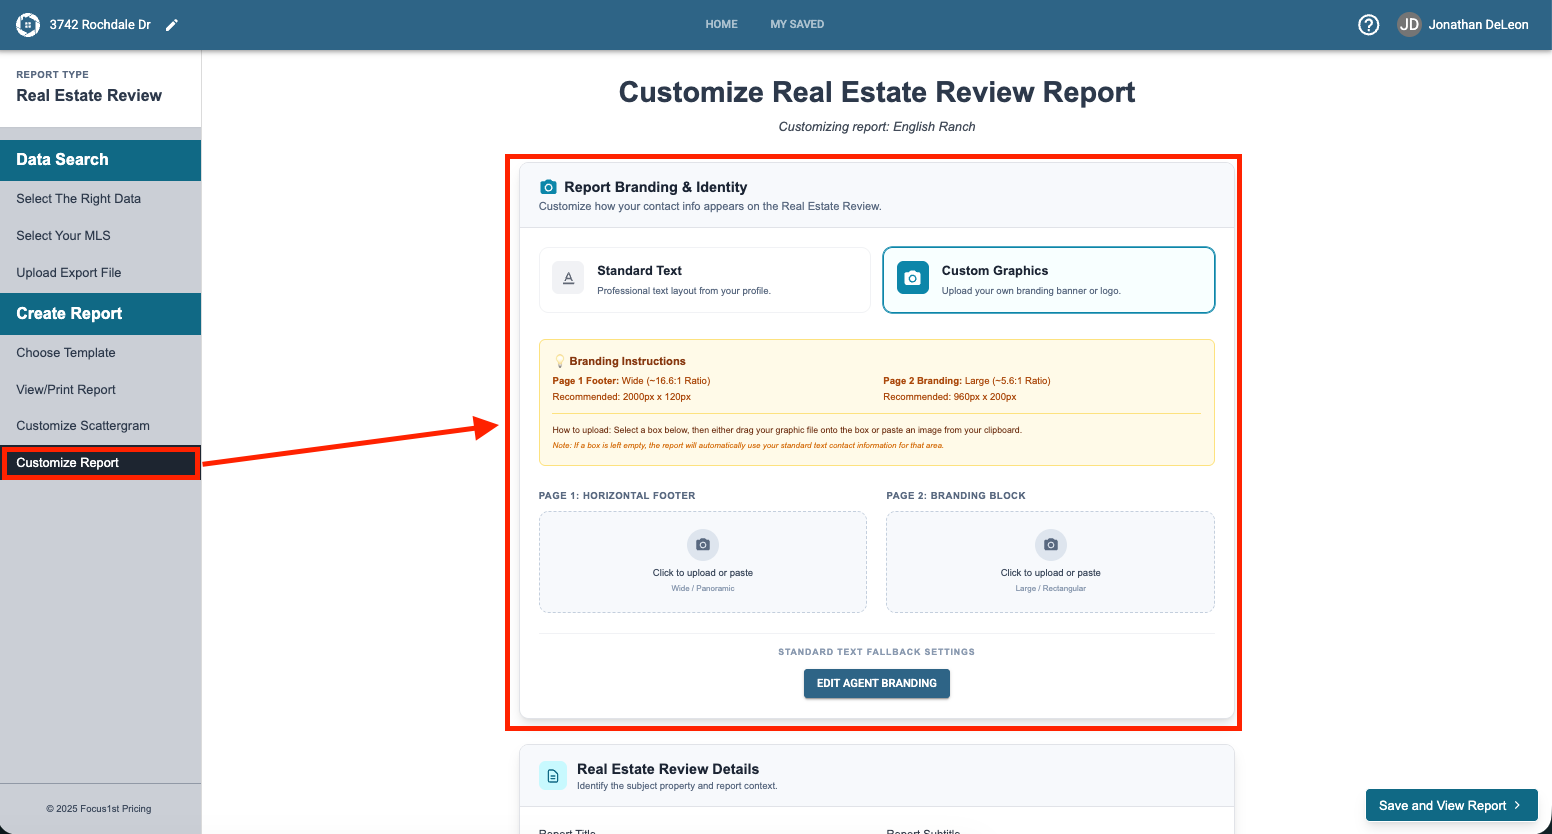
For the 2-Page Real Estate Review you’ll find this control under the Customize Report step after clicking the custom graphics option. Note: On this control there are two custom image uploads, one for the first page and another for the second.
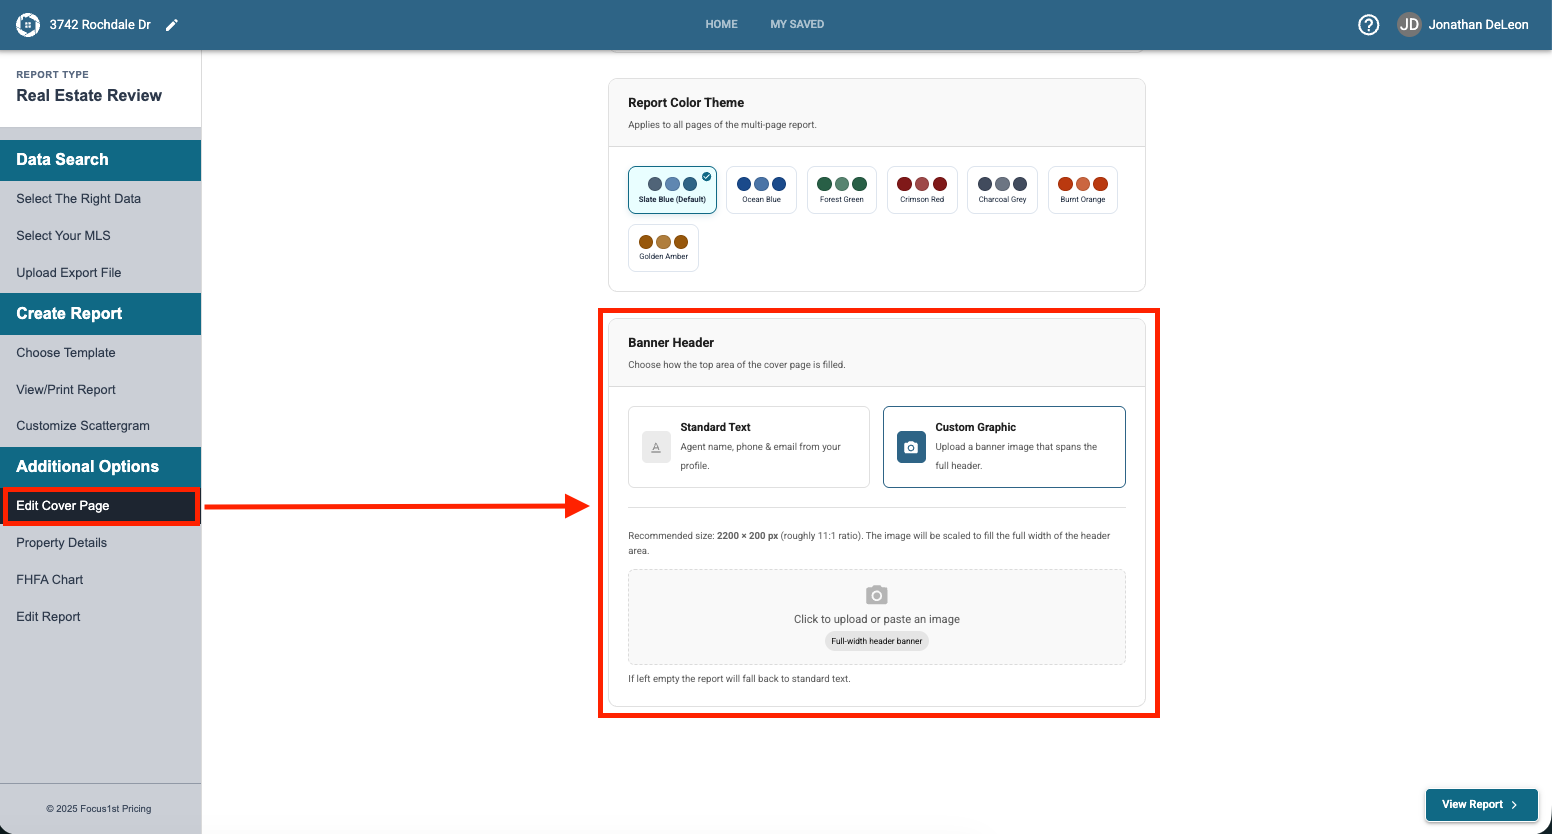
For the Multi-Page Real Estate Review you have one area to upload graphics, this time as a header image. It is located under the Edit Cover Page step where you can upload a header image.
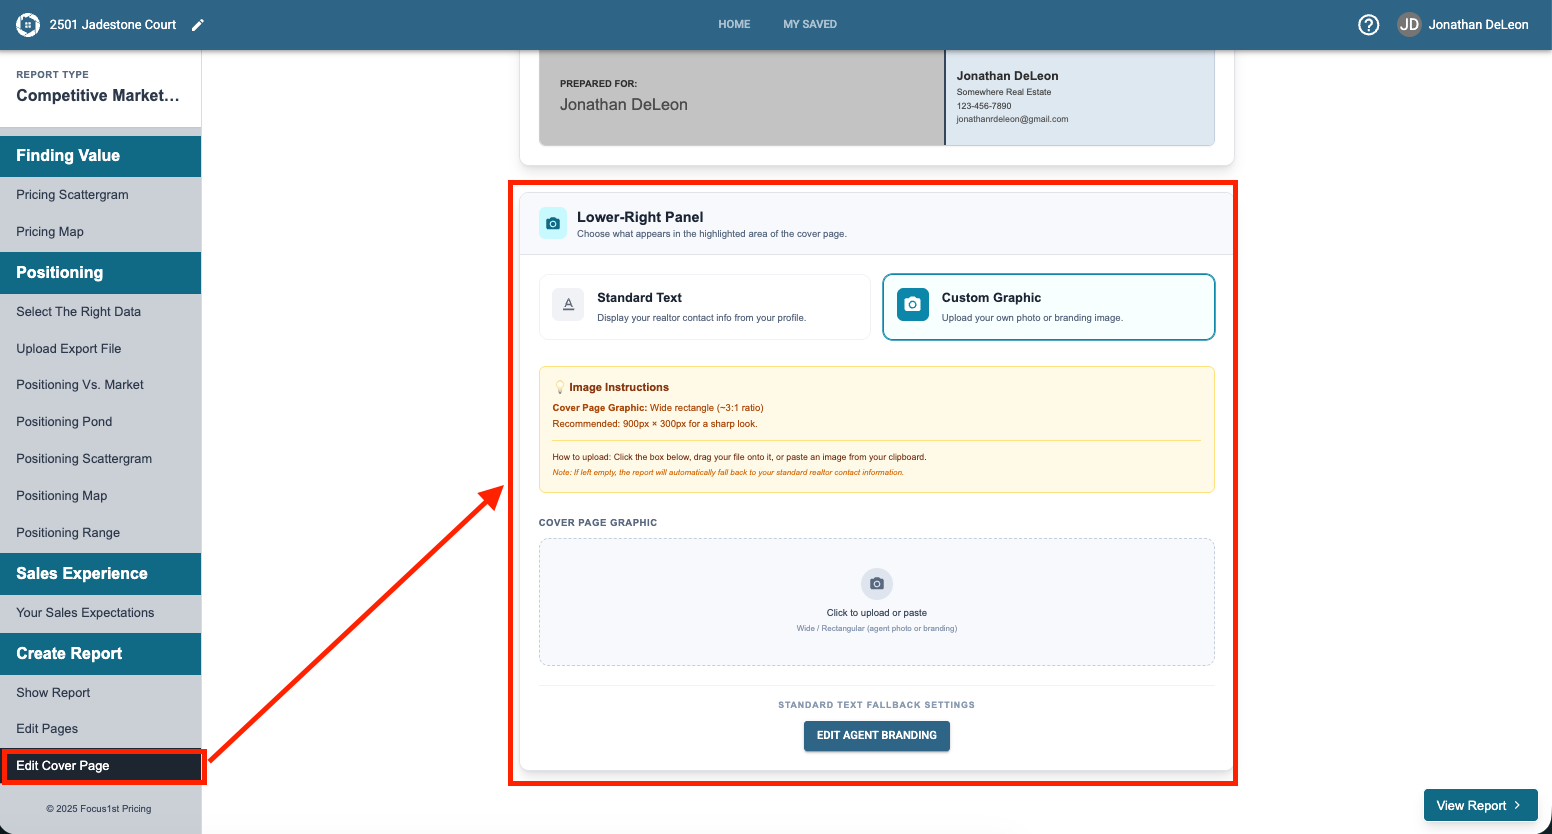
For the CMA you have a lower right panel that you can upload a custom graphic in on the Cover Page. To find this control you’ll need to go the Edit Cover Page step, near the bottom of the sidebar. This may require scrolling down to find.
How the Custom Images Work
Where to Find Upload Controls
Reviews Options
CMA Options